
Our Bulletproof Foundation
I fully realize most of you perusing my historic renovation blog are eager to get to the fun part: light fixtures, plumbing fixtures, cabinetry, hardware, flooring, ceiling beams, lintels, wall treatments, stairway balusters, handrails, trim, tile design and counter surfaces. But most importantly, the 35’ demolished Spanish Revival brick turret connected to four old-world arched fireplaces will be rebuilt with the original 100-year-old bricks saved from our job site. Multiple layers, tough decisions, and numerous creative challenges abound. I can’t wait!
Cribs, Channels and Gradebeams

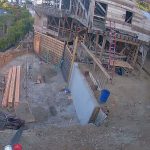
However, before the interior layers begin, penetration deep into the earth to create an unshakable foundation is paramount. As you can see in the image above, our archaic structure required vertical support by custom-made cribs comprised of 2”x 6”and 4”x 4” framing elements placed slightly lower than the previous basement floor. Concrete was poured beneath the cribs and 23’ long steel beams were installed above the cribs to support the archaic structure’s footprint and weight.

Not only was the existing basement and garage demolished due to mold, termites and dry rot, the earth under the southern half of our home’s footprint was excavated in order to replace the compromised foundation. Horizontal channels running north/south and east/west – handily dug by the white Bobcat tractor scoop beneath the basement level – will ultimately support a lower level below the two original middle and upper floors.

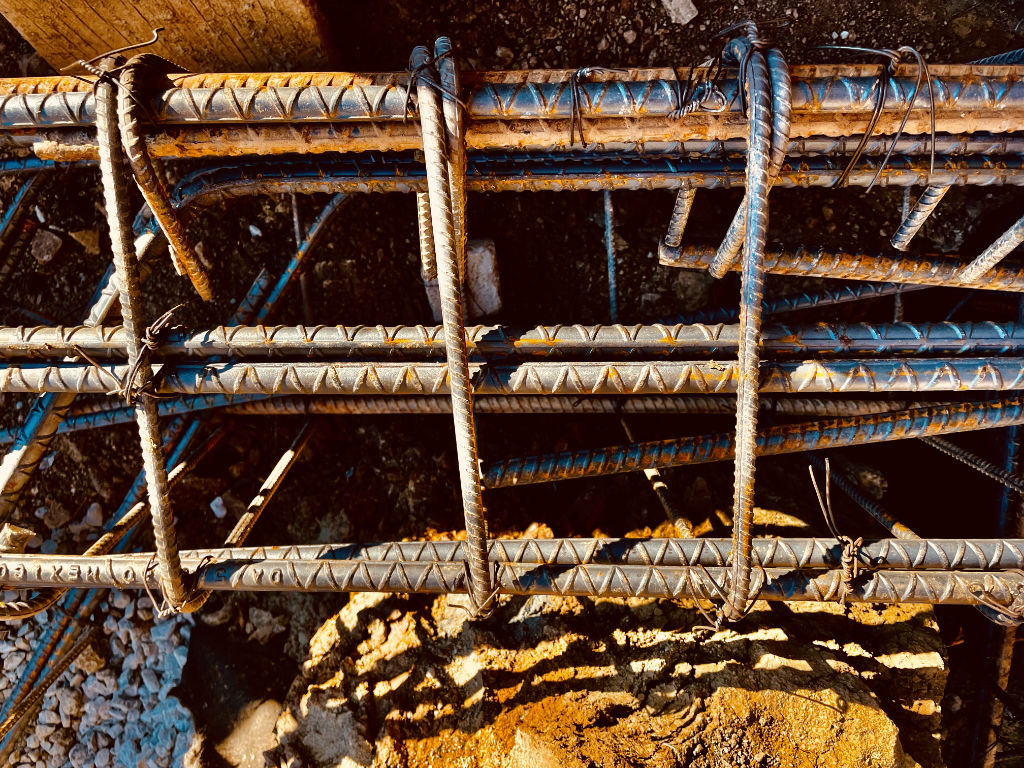
Here you can see steel cages made out of rebar inserted into 2’ wide x 2’ deep horizontal lengths of crisscrossed channels called gradebeams.
Junctions and Spirals

Circular rebar spirals measuring 12” in diameter by 10’ long reinforced with rods of steel at their perimeter running end to end are ready for insertion.

The powerful Bobcat auger drilled 10’ round holes into the earth in all channel junctions to insert the steel enforced rebar spirals. Once the spirals are inserted, rebar cages are placed within each junction on top of the spirals, then tied together and filled with concrete creating gradebeams.

The cage junctions above the 10’ spirals, which are difficult to see in this image, create a formidable grid that shores up the state-of-the-art foundation of our century-old home. This foundation can resist earthquakes, floods, fires and landslides, all of which are part of life in our sunny state of California.
Shovels, Plans and Experts

Our strong-armed crew assists the Bobcat’s tractor scoop with wide mouthed shovels to create linear two-foot horizontal channels.

The blue line represents the shoring wall which holds back the earth on the steep hillside where our home is located. It also reflects the northern interior outline of the new lower level. The orange lines designate the foundation grid now installed in the previous basement and under the terrace where 1300 cubic yards of earth was excavated in order to build the new foundation. The pink line at the bottom of the plan illustrates the 12” thick wood framed wall required to support the edge of the terrace as well as the upper levels.

Pictured here is our project foreman Carlos Nowell, general contractor Edwin Diaz, and project manager Chuck Bond. These construction experts along with our talented Irish engineer, Erevan O’Neill, who designed our foundation, have diligently worked together to implement this amazing structure.
Current Job Site

This image was taken from the east side of our property showing what’s left of our original dwelling. The foundation extends from under the house to the edge of the terrace.
East Exterior Elevation

Pictured here is the east exterior elevation including the rebuilt garage on the right of what our home will look like when completed in the fall of this year.
Phase Two
We are finally nearing the end of our initial phase of the project, thank God, and within weeks will start framing. This upcoming stage will be more visually intriguing as we start to see the result of our years of planning. Stay tuned for the next chapter as we progress toward bringing our floor plans and interior elevations to life.
End of Chrysalis Time
Thanks for your patience and endurance of the foundation portion of our project as we move forward into the more captivating process of creating actual walls that will physically define our new, yet historic structure. The nine months of Golden Gate’s messy chrysalis stage – when caterpillars begin their transformation into butterflies – is almost behind us. To all my dear friends witnessing our journey, please stay tuned to phase two.
In gratitude to all of you and the crew and experts who created our amazing bulletproof foundation.


What a journey so far! So amazing to see this progress. Can’t wait for the next chapter
This is going to be amazing. Rock solid. Thanks for sharing Linda. Love seeing the structural stuff, (and that amazing view.)
FANTASTIC!! Such a project, such an endeavor!! You are so brave to undertake this and it will be beyond spectacular. The piece de resistance of your colorful and exceptional career. SO EXCITING!! Thank you for sharing, Linda. Wishing you and Marshall every happiness.
All I can say is wow!
It’s amazing to see how all of this puzzle will be constructed back together.
Your crew has done an amazing job so far.
I find your posts to be fascinating, loving every step of your journey.
it is a great pleasure to be part of this engineering work.
WOW!!!!
THIS IS WHERE THE BIG BUCKS ARE SPENT AND THE CONTRACTOR IS WORTH WHATEVER YOU HAVE TO PAY TO GET THE JOB DONE CORRECTLY. MANY PEOPLE DO NOT UNDERSTAND THIS. BUT, IF THE FOUNDATION IS NOT SECURE, THE FINISH WORK WILL NOT
STAND THE TEST OF TIME. EACH AREA OF OUR BEUTIFUL EARTH HAS A DIFFERENT BASE AND SOIL MAKE-UP AND MUST BE TREATED IN A SPECIFIC WAY FOR A GOOD FOUNDATION WHEN BUILDING. THAT IS ONE OF THE MAIN REASONS THE COST OF BUILDING IS SO VERIED FROM STATE TO STATE. YOU ARE MAKING WISE DECISIONS IN WHICH YOU WILL BE MOST THANKFUL IN THE FUTURE. HERE IN ARKANSAS AND TEXAS, THE COST OF ALL MATERIALS ARE RISING RAPIDLY AND WE ARE HAVING TO WAIT FOR MONTHS WHEN ORDERING. (ESPECIALLY WINDOWS). GOOD LUCK AND LOTS OF PATIENCE!
DANELLE
…wow…simply wow…
Mind BOGGLING! As always, you do the proper foundation work💫
Can’t wait to see your new
butterfly emerge from it’s cocoon! waiting with anticipation!
Beyond intriguing! Most of us never get to see the under-girding of our homes. Oh how safe you will feel! And oh the joy of seeing your butterfly emerge. Thanks for the sharing and the wonderful education, dear Linda!
Beautiful home!
Do you know any more about the history of the beautiful flower pot with the ladies on it. I have 2 similar ones. I would love to know more about them. Thanks
Your pictures are amazing and so detailed. Love the drawn plan for finished home. Exciting for everyone.
Going back to read your saved blogs… so amazed at the intricacies of the foundation. Wow!what a project. Looking forward to catching up on the next blogs!